Setting up an Ubuntu lab in Azure Labs
I have recently had the opportunity to begin using Azure Labs (https://labs.azure.com) for my classes. This lab environment helps to replace a previously self-made and self-maintained VMware environment. By building a lab with a virtualization layer (such as Hyper-V), this lab environment helps build flexibility and repeatability to my teaching. While primarily designed for working with Windows images, Azure Labs can also work with Linux.
In this document, I will walk through how to setup an Ubuntu 20.04 LTS image in Azure Labs. I will assume you already have an account setup for Azure Labs and some familiarity with how it works.
Enable Ubuntu as an available image
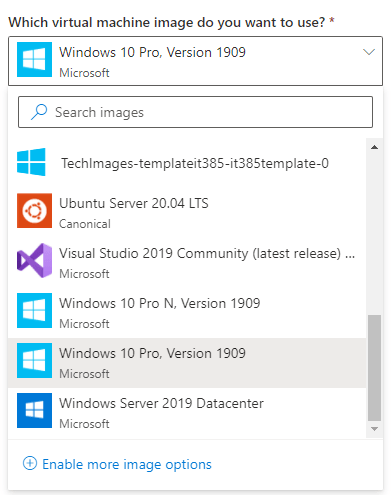
When you create a new lab in Azure Labs, you will be prompted Which virtual machine image do you want to use? Most of the default image are Windows OSs, but there is an option for CentOS and a Data Science Virtual Machine based on Ubuntu.
At the bottom of the drop-down, you can click Enable more image options to view additional images.
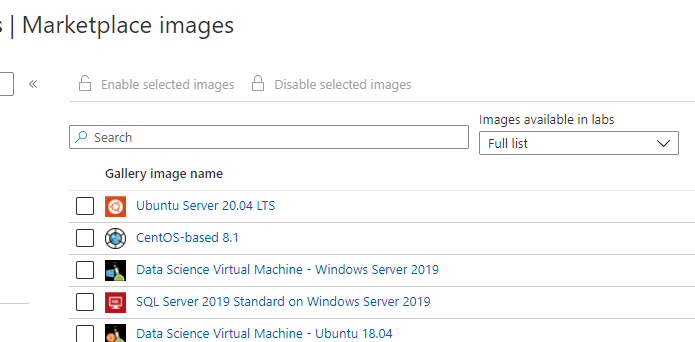
When you click to enable more image options, you are taken to Microsoft Azure Portal with a list of Marketplace images. On this page, you can use the Search feature to find a specific image name, select it, and click Enable selected images.
Create the lab
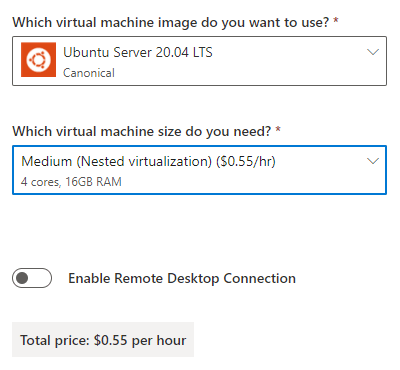
Once the Ubuntu Server 20.04 LTS image has been enabled, return to Azure Labs and continue creating the lab environment. This time select the Ubuntu image for installation
Below the virtual machine size drop down, a new option is available that says Enable Remote Desktop Connection. Select this option to enable RDP for this lab
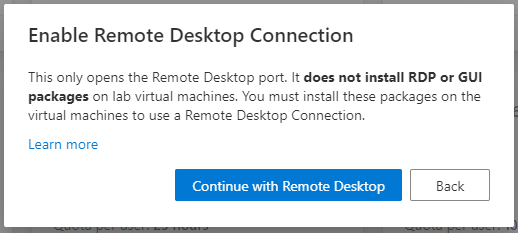
When you select to enable RDP, you will get a pop-up message telling you that this option only opens the firewall for RDP, and does not install RDP or GUI packages. Click Continue with Remote Desktop to continue building out the lab as normal.
Connect to Ubuntu
Because the Ubuntu image provided by Microsoft is a Server image, id doesn’t include a desktop environment or the necessary features for Remote Desktop. To enable these, we need to install and configure them. Note; These steps are inspired by the instructions found at https://linuxize.com/post/how-to-install-xrdp-on-ubuntu-20-04/
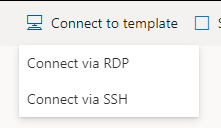
In the Azure Lab environment start the template as normal. Once the template state has changed to Running, click Connect to template and then Connect via SSH. We will use the displayed information to connect.
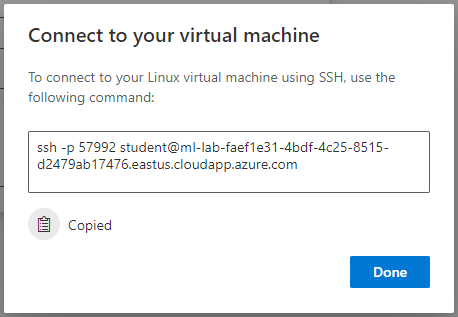
To connect using PuTTY, copy the FQDN of the host ( the portion after the @ ) and paste into the Host Name text box of PuTTY . In the screenshot above, the FQDN starts with ml-lab-faef….azure.com.
Copy the port number ( the number after -p ) into the Port field in PuTTY. Ensure SSH is still selected and when ready, click Open
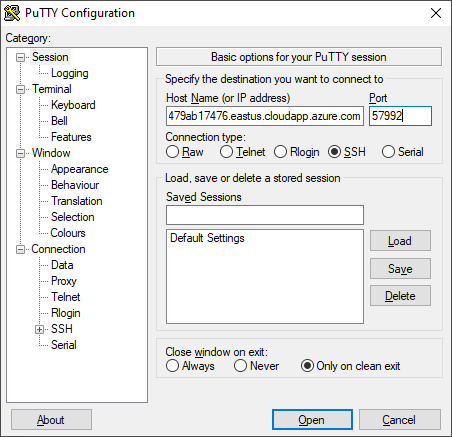
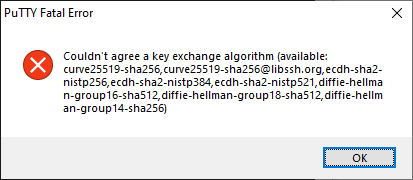
Note: If you receive the following error regarding the key exchange algorithm, you may need to upgrade PuTTY to the latest version
You will be prompted to accept the SSH key when you first connect. Say Yes to continue logging in. When prompted, login with the username and password you specified when you created the lab.
Configure Ubuntu
Install the Ubuntu desktop and XRDP by running the following commands on the server.
sudo apt update
sudo apt install ubuntu-desktop xrdp -y
Open the firewall, configure and restart XRDP
sudo ufw allow 3389
sudo adduser xrdp ssl-cert
sudo systemctl restart xrdp
Fix permissions by running
sudo sed -i 's/auth_admin/yes/g' /usr/share/polkit-1/actions/org.freedesktop.color.policy
Login via RDP
Back in Azure Labs webpage, select Connect to template and Connect via RDP. This will download an RDP file that Windows can open to connect with. Open the RDP file
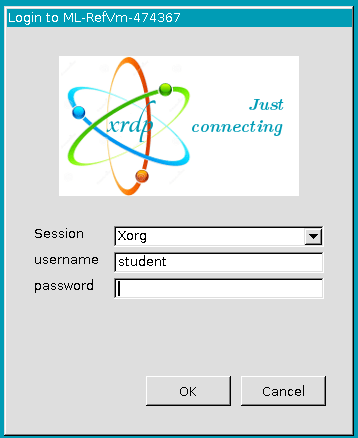
When prompted, enter the username and password you created when you setup the lab
Improving GUI performance
By default, XRPD is fairly slow in responding to the GUI and can be sped up somewhat. The best I have found so far is to limit the Bits Per Pixel (bpp) used by XRDP. To do this exit the file /etc/xrdp/xrdp.ini. Find the line that says max_bpp and change it to 16