Increasing swap space in Linux
There are lots of articles out there that describe how to increase the swap size on your Linux VM, unfortunately most dont appear to include step-by-step instructions. One great example is http://www.thegeekstuff.com/2010/08/how-to-add-swap-space/, which provides a couple of different scenarios, but it causes the systems to become non-standard configurations.
This post will describe the process I used in our VMware environment. The goal was to keep the configuration as standard as possible, not lose any data, and increase the available swap size. Our default configuration is 4 vCPU, 4GB RAM, 2GB Swap, and 20GB harddrive. This process will increase the swap size to 6GB using a tool known as GParted.
- Increasing swap space in RHEL 6.2 on VMware
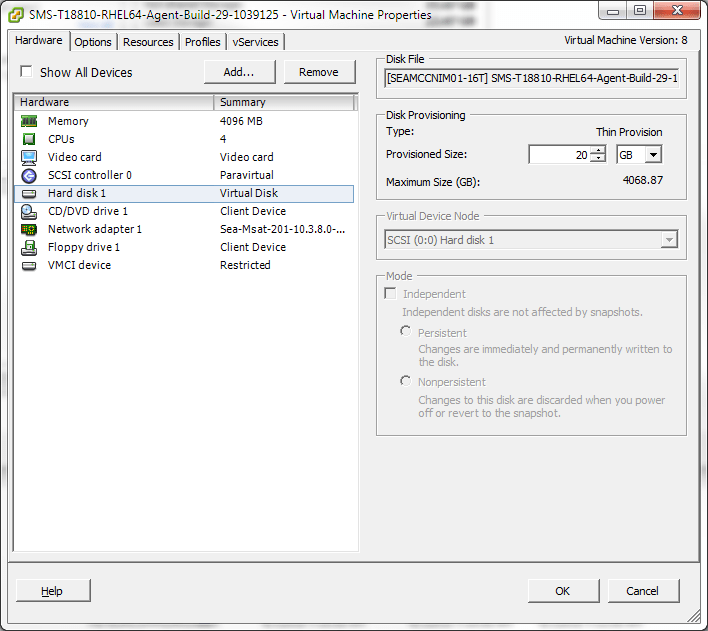
- Open VM properties and increase the disk space by at least the amount of swap needed.
- I normally bump our VMs from 20GB to 30GB even though I am only adding 4GB of swap. I simply due this because its easy, and I dont want to be in the position of redoing the work simply because I was 1KB short on my math
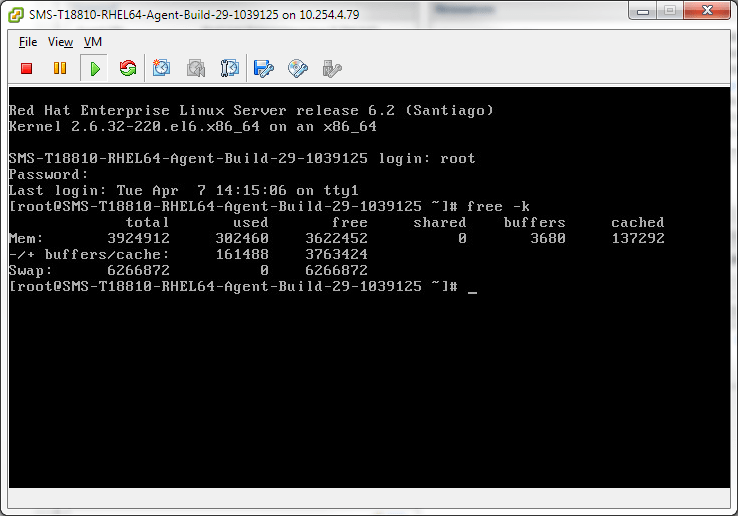
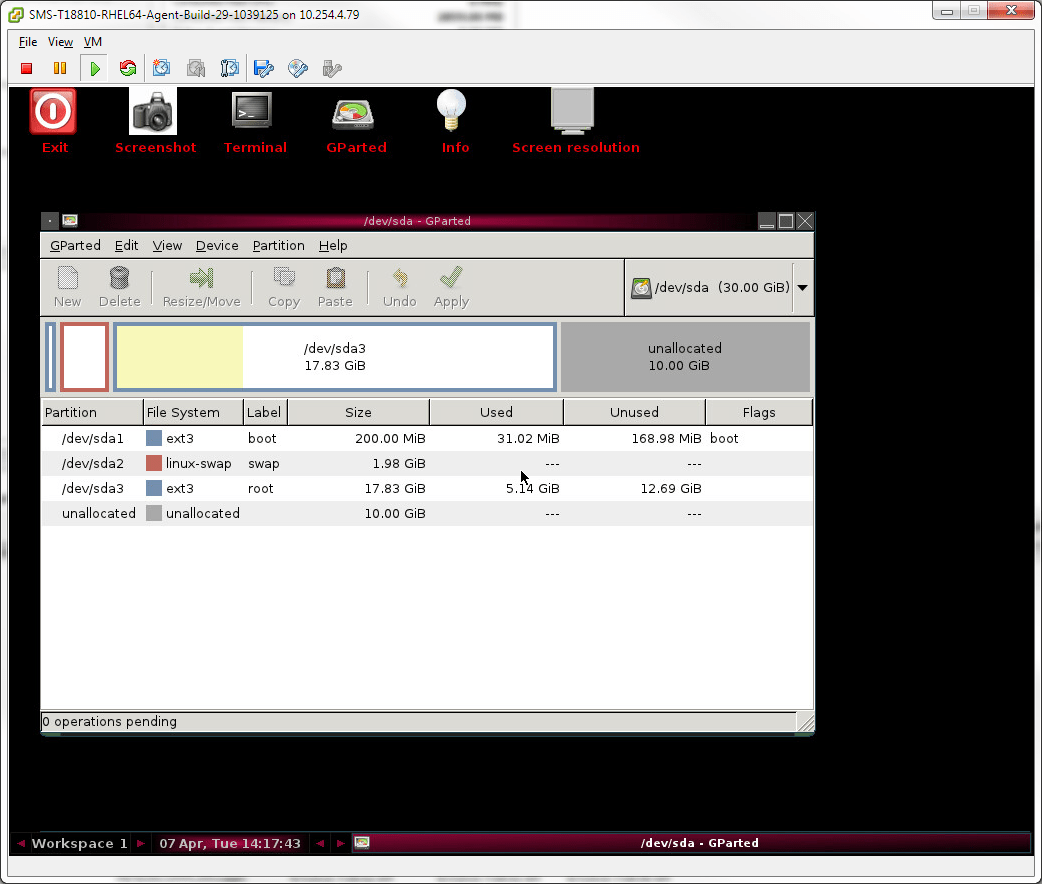
- Log into the VM and verify the swap space by executing free –k. Here we can see that the swap space is 2GB
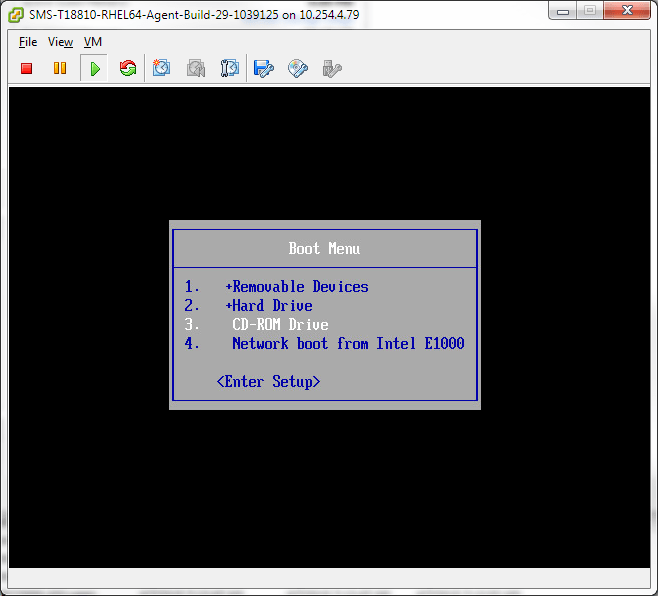
- Mount the GParted Live CD ISO and reboot the VM to the disk
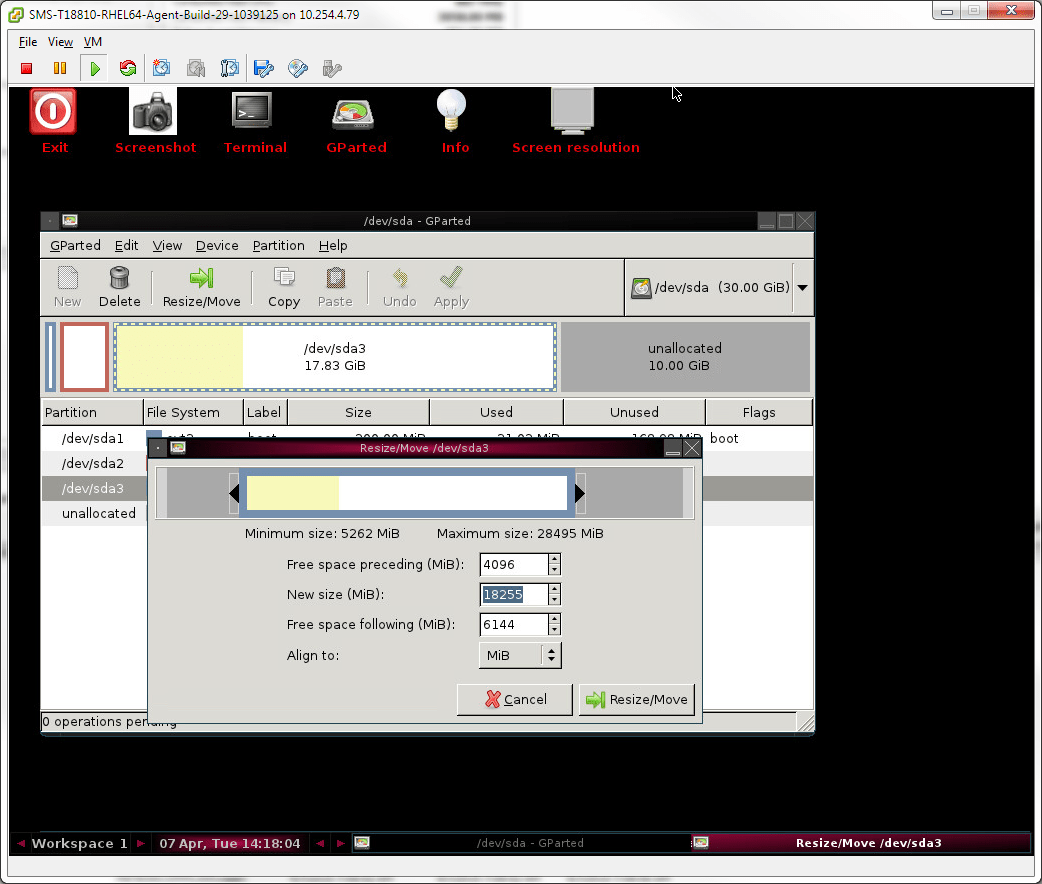
- Select the data partition and choose to move it back. In this case, I need 4GB of additional swap so I change the Free space preceding (MiB) to 4096. This essentially pushes the partition, and all its data, back 4GB
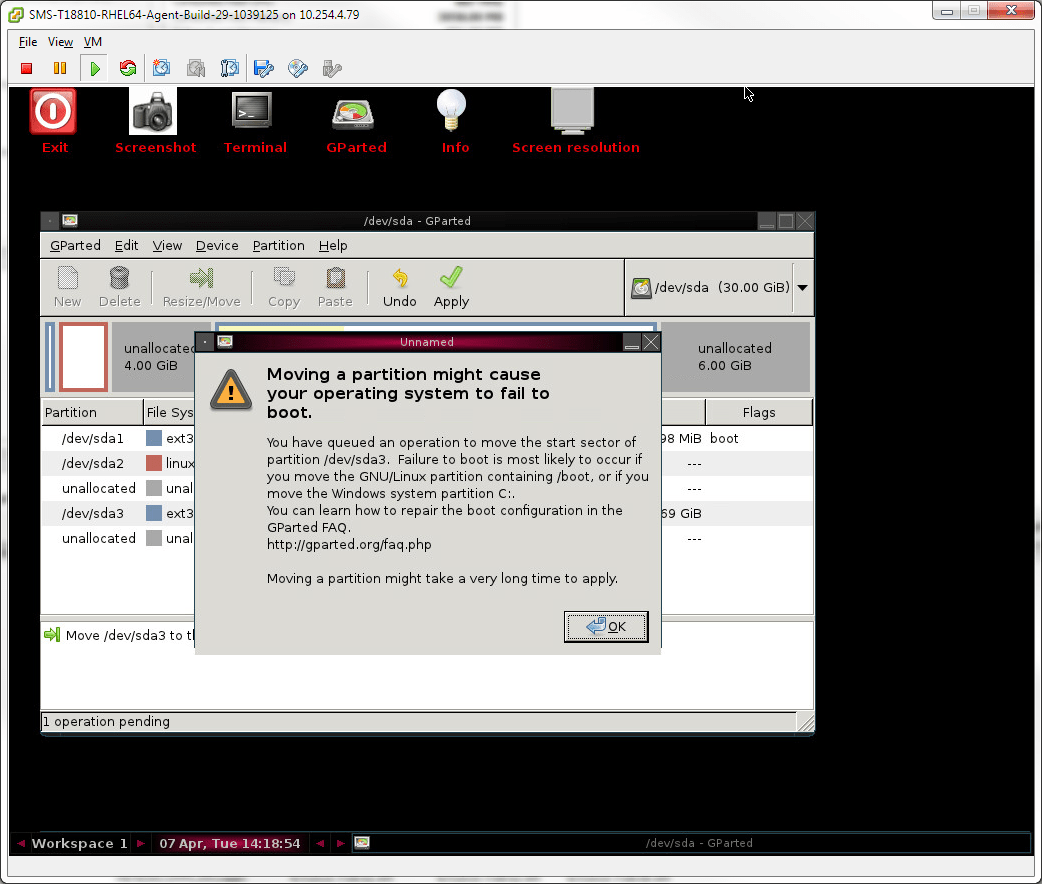
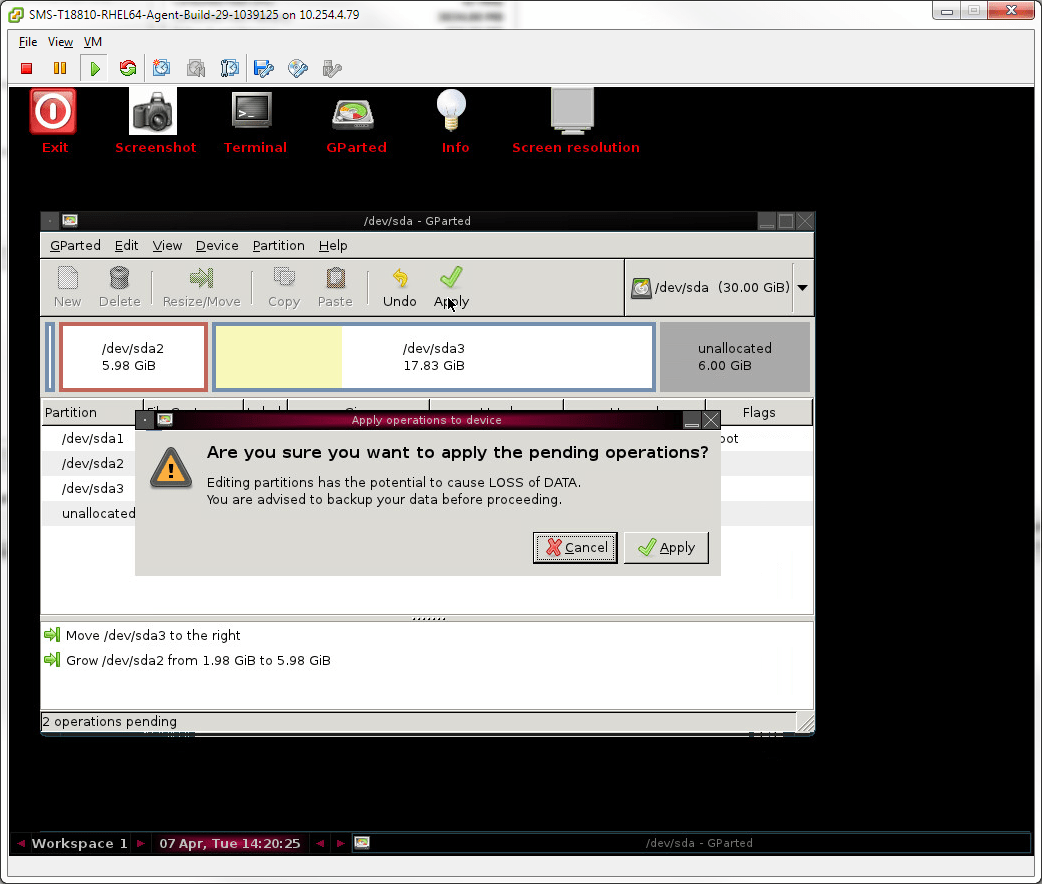
- Accept the warning – you do have a backup, right?
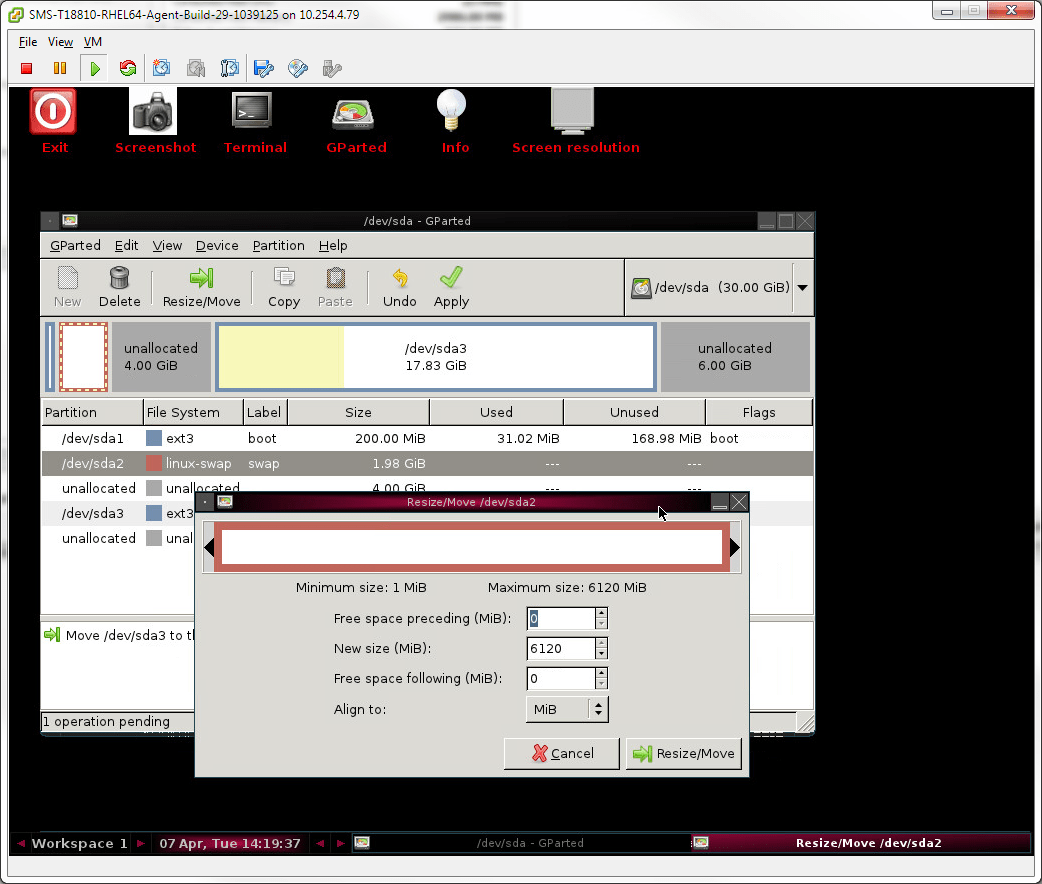
- Select the swap partition and click to resize it. Select the right arrow and drag it to the end, allocating all of the free space to the partition. The Free space preceding and Free space following should both be 0
- Click Apply and Apply to confirm
- When finished, reboot
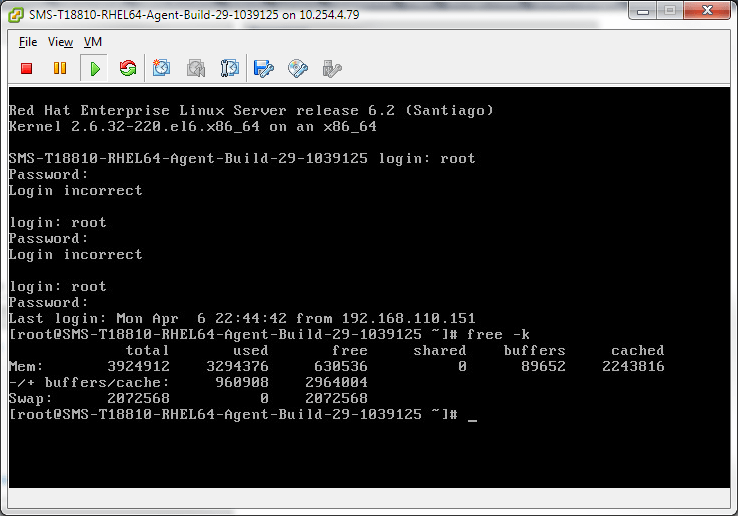
- Log in and confirm the change with free –k